This past summer, I tried my first ever detox cleanse. People do detoxes or cleanses for many different reasons, but for me it was all about re-setting my body to how it is supposed to function and ridding my body of all the harmful toxins it had accumulated.
After freshman year and not really taking care of my body, I felt this was the most appropriate time. So I did my research and of course, I ADORE Oprah, so I had to check out if Dr. Oz had any program. It turned out that he does! Dr. Oz designed a 3 day detox cleanse that is incredibly simple so somebody like me (not exactly an expert) could follow along easily and successfully.
Basically, this detox consists of drinking four smoothies a day. There are three recipes – one for each meal. You are allowed to repeat your favorite smoothie as a snack between dinner and lunch. You take vitamins throughout the day and have green tea with lemon and Stevia in the morning. At night, you reward yourself with an Epsom salt bath with lavender extract. Pretty simple, right? Every single vitamin, ingredient, and sip of tea has been scientifically designed to provide your body with the nourishment it needs and to effectively flush out harmful toxins.
Dr. Oz compiled everything (even the shopping list!) into this one page super handy sheet. 
That was my Bible for the three days.
If you’re interested in doing this at some point, I would HIGHLY recommend it. It’s so easy to do and the best part is that you can prep everything in advance. It’s great for people on the go with busy schedules. Spend maybe an hour the first day prepping everything for each smoothie. Put all of the dry ingredients into freezer bags and when you want that smoothie, just grab it and add the liquids and blend! Super quick, super easy.
Each step of the detox is critical right down to soaking in the bath. Do not skip any steps! Everything has been chosen deliberately and carefully for the best results possible.
My experience:
I went into this detox with an open mind and heart. I had no idea what I was about to do, but I was determined to DO it. I committed myself 150% to sticking it out all three days. I’m not going to sugarcoat it – the first two days are extremely difficult. In the case of this detox, it is ABSOLUTELY mind-over-matter. The third day is not as bad because it becomes more of a habit at that point.
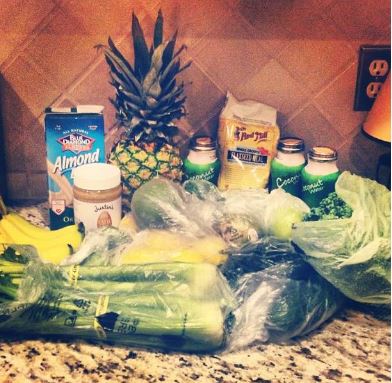
Here’s my groceries for the three days:
 Breakfast was AMAZING! I love it and still drink it all the time.
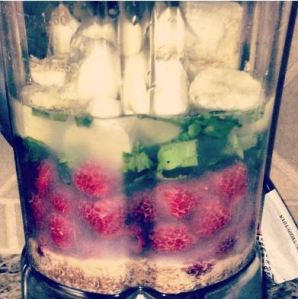 Lunch was good too. I really enjoyed it when I added 1/2 cup more pineapple. You’re really not supposed to alter the recipes at all, but it just needed to be a bit sweeter. Also, a few tips to make the texture better – cut up everything TINY! And blend one ingredient at a time. There’s a lot of course veggies going into this smoothie. You want to make sure it’s smooth, otherwise you’re going to hate it. In the picture below, that was my first time making it and I blended everything together at once and did not cut things up small. It was a very gross texture. So don’t do that! But I also still drink this one!
 I did not like dinner one bit. Perhaps it’s because of the cayenne pepper. A lot of people posted online and seemed to really enjoy dinner, but I absolutely HATED it! I really had to just grin and bear it by gulping it down fast. That’s why I didn’t take a picture. Because I was mad at that smoothie. Because it was evil.
Make sure you treat yourself to the bath and the morning tea! Those were the highlights of my day.
My results:
I felt lighter and I had much more energy. I never was hungry on this detox – I simply missed solid food and crunching. It’s definitely one of the easiest and best things you can do for your overall health and body. I lost three pounds total and a LOT of bloat. I would HIGHLY recommend this to anybody. But beware – do NOT go back to eating terrible foods after this. Continue eating a clean and healthy diet and you will be golden. This is supposed to reset your system. It is NOT a miracle weight loss diet. The weight I lost was purely a bonus.
Anyways, if anybody has ANY questions at all, do not hesitate to ask me. I could talk about this detox forever! Happy cleansing y’all!


